Course Materials


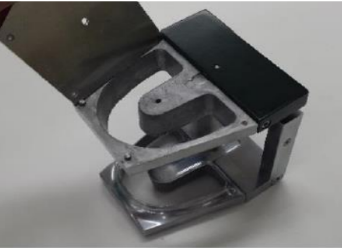
Introducing the Typodont Training Model
a compact and versatile tool designed for superior dental training. Observe tooth movement from every angle, flatten the unit for hands-on practice, and adjust jaw positioning and post height with ease. Built-in springs simulate rotational movements, making it an essential tool for comprehensive dental education.

Compact and simple in construction, yet offers superior functionality. Ideal for practical trainings or courses.

Movement of the teeth are observable from all angles.

The entire unit can be flattened, which facilitates practical work.

The anterior-posterior positioning of the upper and lower jaws is adjustable (max. 10mm each) with provided wrench.

Post height is adjustable (max. 7mm) with provided wrench.

Rotational movement can be simulated by pushing the built-in springs.

Comes with Post, wax form base, base plate, and 2.5 mm hex wrench.
Pros
-
✓
Compact and simple in construction, yet offers superior functionality.
-
✓
Ideal for practical trainings or courses.
-
✓
Movement of the teeth are observable from all angles.
-
✓
The entire unit can be flattened, which facilitates practical work.
Helpful Instructions
How to Set Wax Form in the Typodont
Follow along for a step by step guide on setting the wax form into the Typodont.
Step-By-Step Guide
1. Remove upper and lower base plates by using slotted screwdriver.
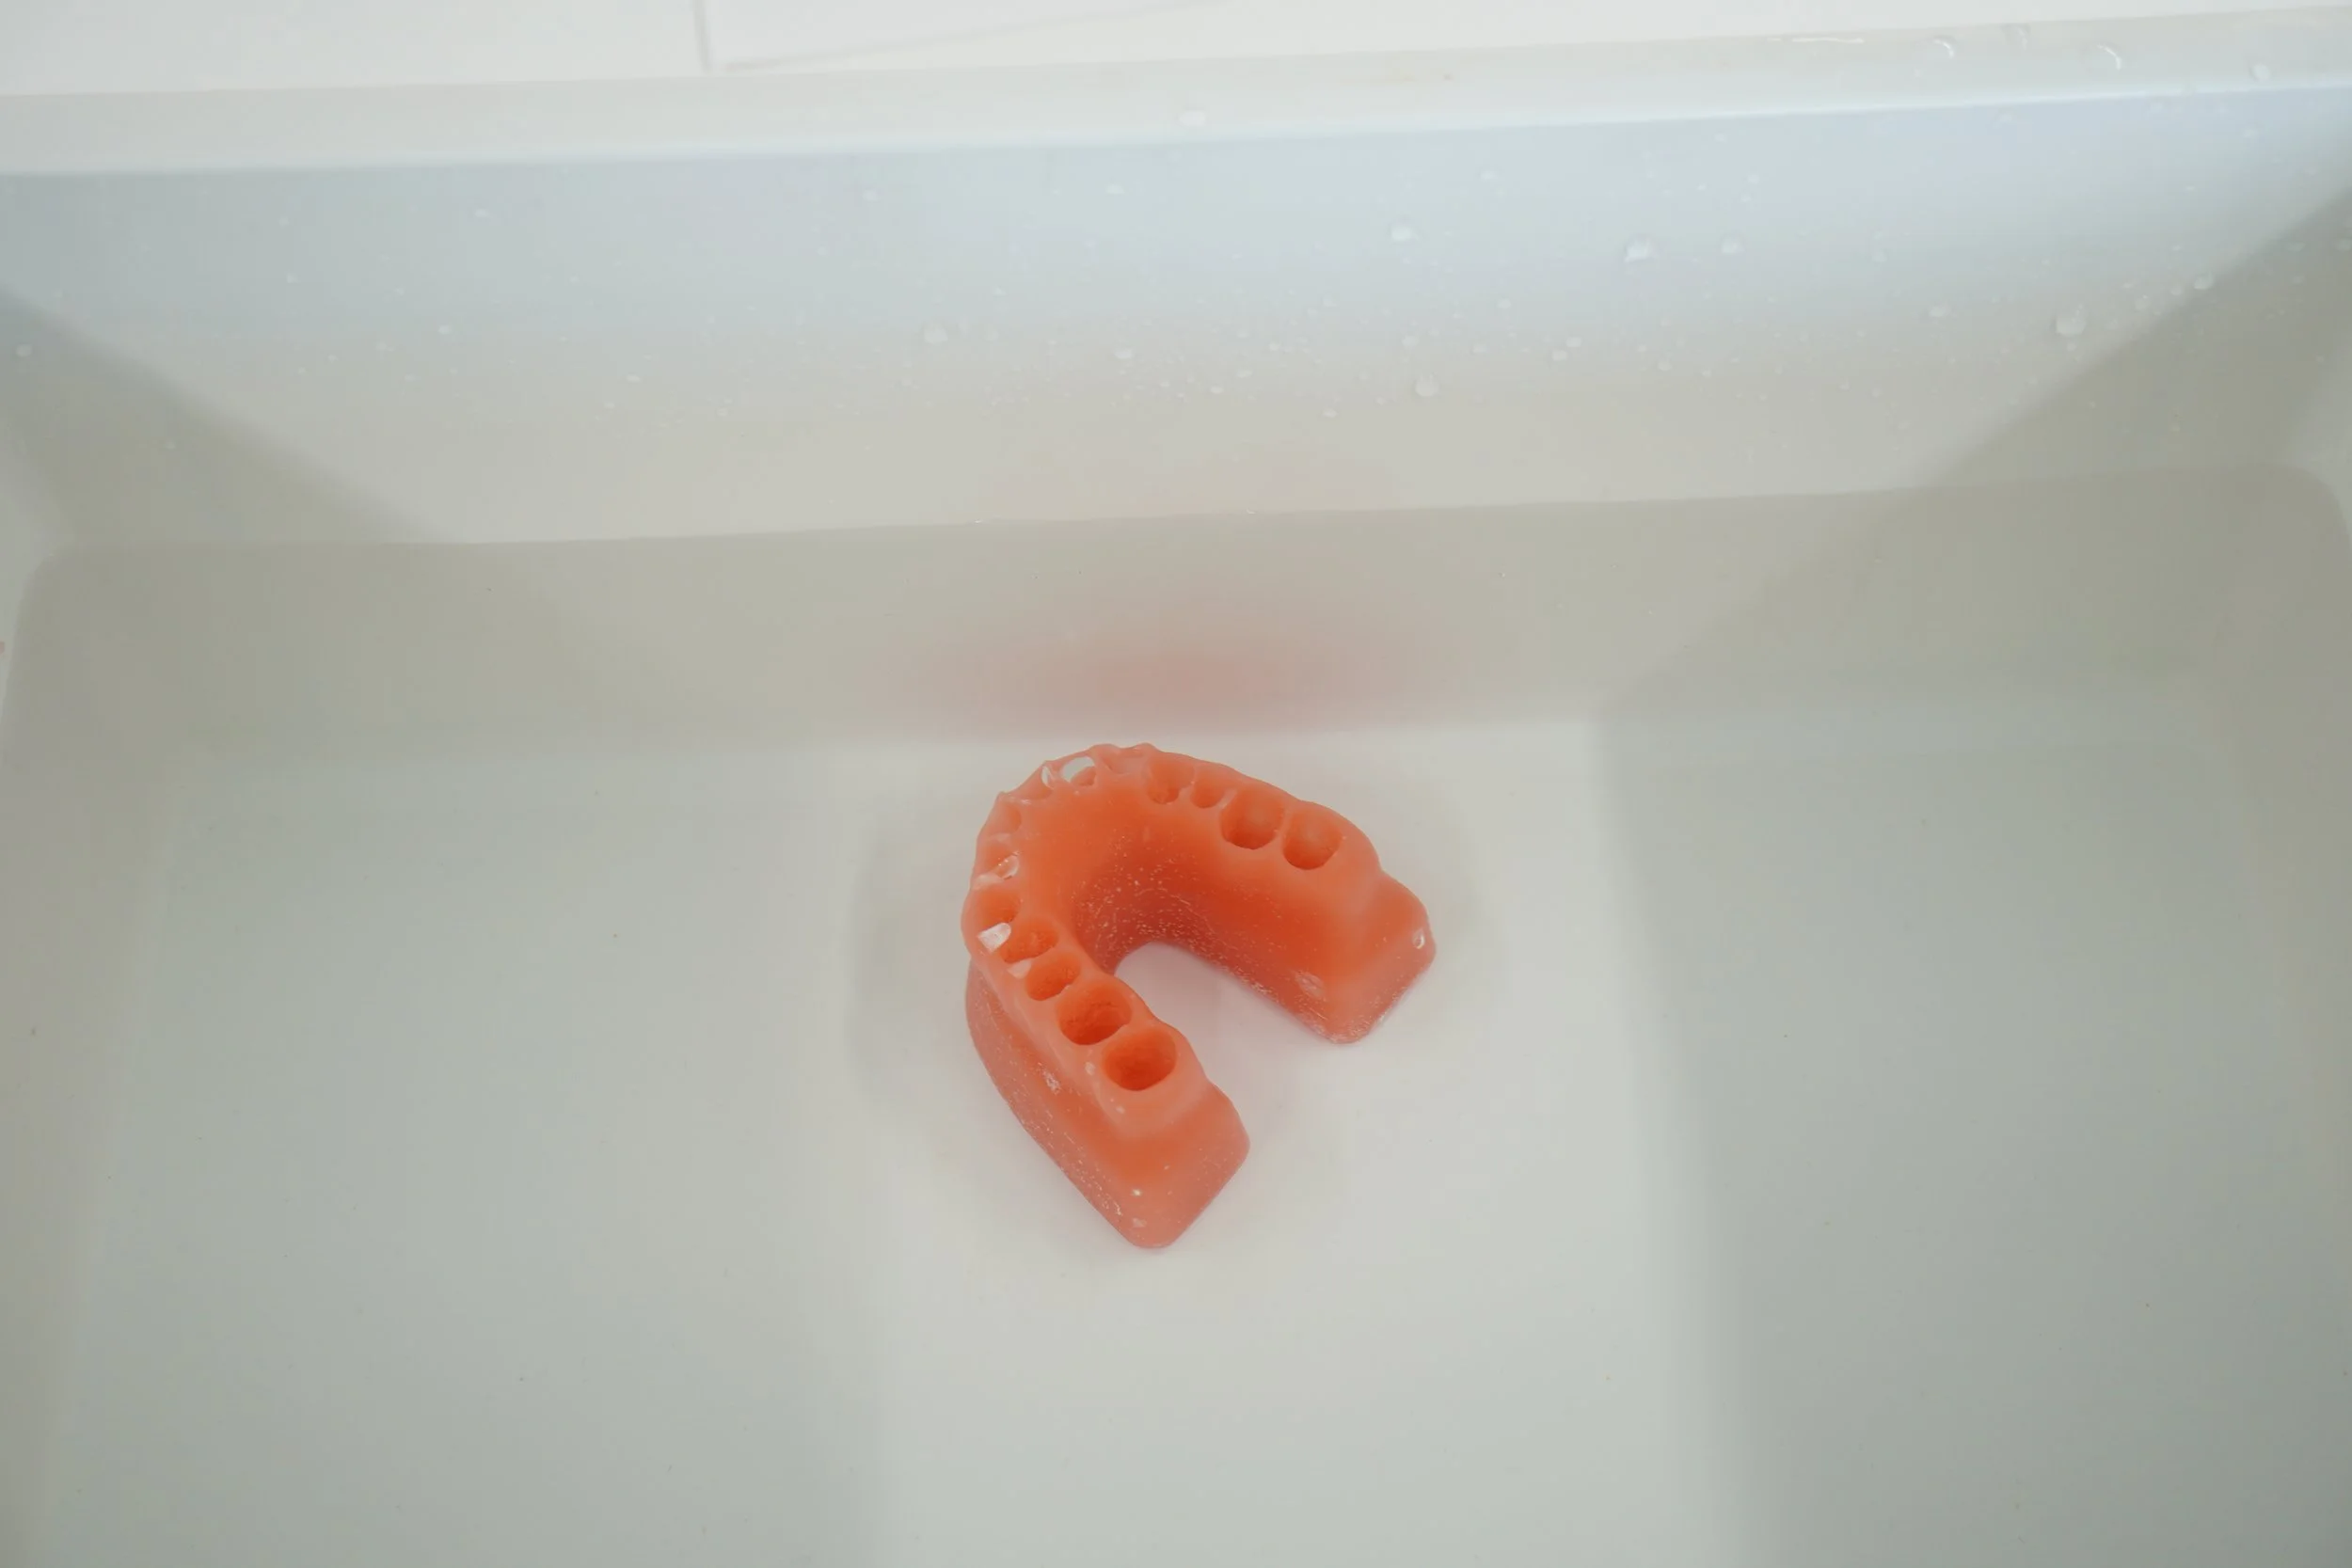
2. Immerse Wax Form in warm water between 40~43°C for 3 minutes. (Use of thermo bath, etc. is recommended.)

3. Insert Wax Form into the upper / lower frames. Hold the basal portion of the Wax Form and insert slowly from the anterior side (see photo). Holding the cervical area may cause deformation. * Mandible Wax Form is already set in the picture.

4. Remove excess wax from the base plane and flatten the surface with a spatula, etc. Put back the base plates and tighten the screws.

5. Insert Metal Teeth. To facilitate insertion, immerse Typodont with Wax Form in warm water.
Product Codes
Typodont
Product Code : TYPO2
Metal Teeth
Product Code : MT2
Wax Form
-
Product Code : WFN
-
Product Code WF1
-
Product Code: WF21
-
Product Code: WF22
-
Product Code: WF3